
本期推荐的是一个基于Vue.js的桌面软件开发框架——electron-egg。

目前国内的开发者将近700万,桌面软件受限于学习门槛和移动化趋势,渐渐平庸。但我们日常工作中,又离不开桌面软件,因此希望有一个学习门槛低,支持多平台的软件框架。electron-egg就是在这种需求下诞生的,开发者只需要掌握js开发就能上手electron-egg。
特性
- 跨平台:一套代码,可以打包成windows版、Mac版、Linux版或者以web网站运行
- 简单高效:只需学习js语言,支持vue、react、ejs等
- 工程化:可以用服务端的开发思维,来编写桌面软件
- 高性能:可启动多个工作进程
- 功能丰富:服务端的技术场景,如:路由、中间件、控制器、服务、定时任务、队列、插件等
安装
1. 下载
# gitee
git clone https://gitee.com/wallace5303/electron-egg.git

# github
git clone https://github.com/wallace5303/electron-egg.git
2. 安装
# 推荐node版本 14.16.0

# 进入目录 ./electron-egg/
# 提升安装速度,使用国内镜像;
npm config set registry https://registry.npm.taobao.org
npm install
3. 常用命令
# 开发者模式
	# 1:【进入前端目录】,启动前端服务
  cd electron-egg/frontend && npm install && npm run serve
  # 2:【根目录】,启动后端服务
  npm run dev

# 预发布模式(环境变量为:prod)
npm run start

# 打包 (windows版本)
npm run build-w (32位)
npm run build-w-64 (64位)

# 打包 (mac版本)
npm run build-m
npm run build-m-arm64 (m1芯片架构)

# 打包 (linux版本)
npm run build-l

# web运行-开发模式
npm run web-dev

# web运行-生产者模式-启动
npm run web-start

# web运行-生产者模式-停止
npm run web-stop

# 移动前端静态资源
npm run rd
使用
1. 选择开发模式
打开配置文件:
electron-egg/electron/config.js,可修改如下配置:
  developmentMode: {
    default: 'vue', // 默认前后端分离,使用vue
    mode: {
    	// 前后端分离,使用vue开发,端口与vue启动的serve一致
      vue: {
        hostname: 'localhost',
        port: 8080
      },
      // 前后端分离,使用react开发,端口与react启动的serve一致
      react: {
        hostname: 'localhost',
        port: 3000
      },
      // ejs模板渲染
      ejs: {
        hostname: 'localhost',
        port: 7068 // The same as the egg port
      }
    }
  },
2. 启动
- vue模式
# 1:【进入前端目录】,启动vue
cd electron-egg/frontend
npm run serve

# 2:【根目录】,启动electron服务
npm run dev- react模式,同vue
- ejs模式,模板渲染
# 直接启动桌面应用即可
# 根目录
npm run dev
3. 编写一个api,供前端使用
3.1 创建路由
在
electron-egg/app/router/index.js文件中,添加:
router.get('/hello', controller.v1.home.hello);3.2 在控制器层中(
electron-egg/app/controller/v1/home.js),编写方法
  async hello() {
    const { ctx, service } = this;

    const data = {
      title: 'hello'
    };

   this.sendSuccess(data);
  }
3.3 访问api
http://localhost:7068/hello4. 如果是ejs模板渲染方式,编写一个hello页面
4.1 创建路由
在
electron-egg/app/router/index.js文件中,添加:
router.get('/helloPage', controller.v1.home.helloPage);4.2 创建
electron-egg/app/view/hello.ejs视图文件
<!DOCTYPE html>
<html>
  <head>
    <title><%= title %></title>
    <link rel='stylesheet' href='/stylesheets/style.css' />
  </head>
  <body>
    <h1><%= title %></h1>
    <p>Welcome to electron-egg</p>
  </body>
</html>
4.3 添加方法
在
electron-egg/app/controller/v1/home.js文件中,添加方法:
  async helloPage() {
    const { ctx } = this;

    const data = {
      title: 'hello'
    };

    await ctx.render('hello.ejs', data);
  }
详细文档:https://eggjs.org/zh-cn/tutorials/index.html
5. 打包成exe、dmg、deb可执行文件
5.1 移动前端资源文件;vue或react模式(ejs模式、网站变应用程序模式,无需此步骤)
方式一:使用命令
npm run rd方式二:手动更新资源
先将构建后的资源(dist文件夹中的所有文件)放入 electron-egg/app/public 中,然后复制index.html内容到 electron-egg/app/view/index.ejs
5.2 执行打包命令,生成的可执行程序目录:electron-egg/out
# 打包 (windows版本)
npm run build-w (32位)
npm run build-w-64 (64位)

# 打包 (mac版本)
npm run build-m
npm run build-m-arm64 (m1芯片架构)

# 打包 (linux版本)
npm run build-l
使用场景
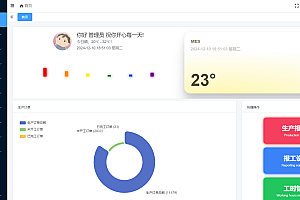
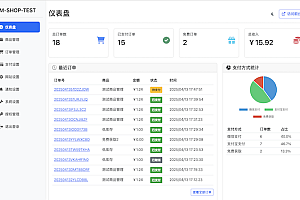
- 常规桌面软件


- 游戏(h5相关技术开发)

- 任意网站变桌面软件


更多内容大家可自行前往阅读。