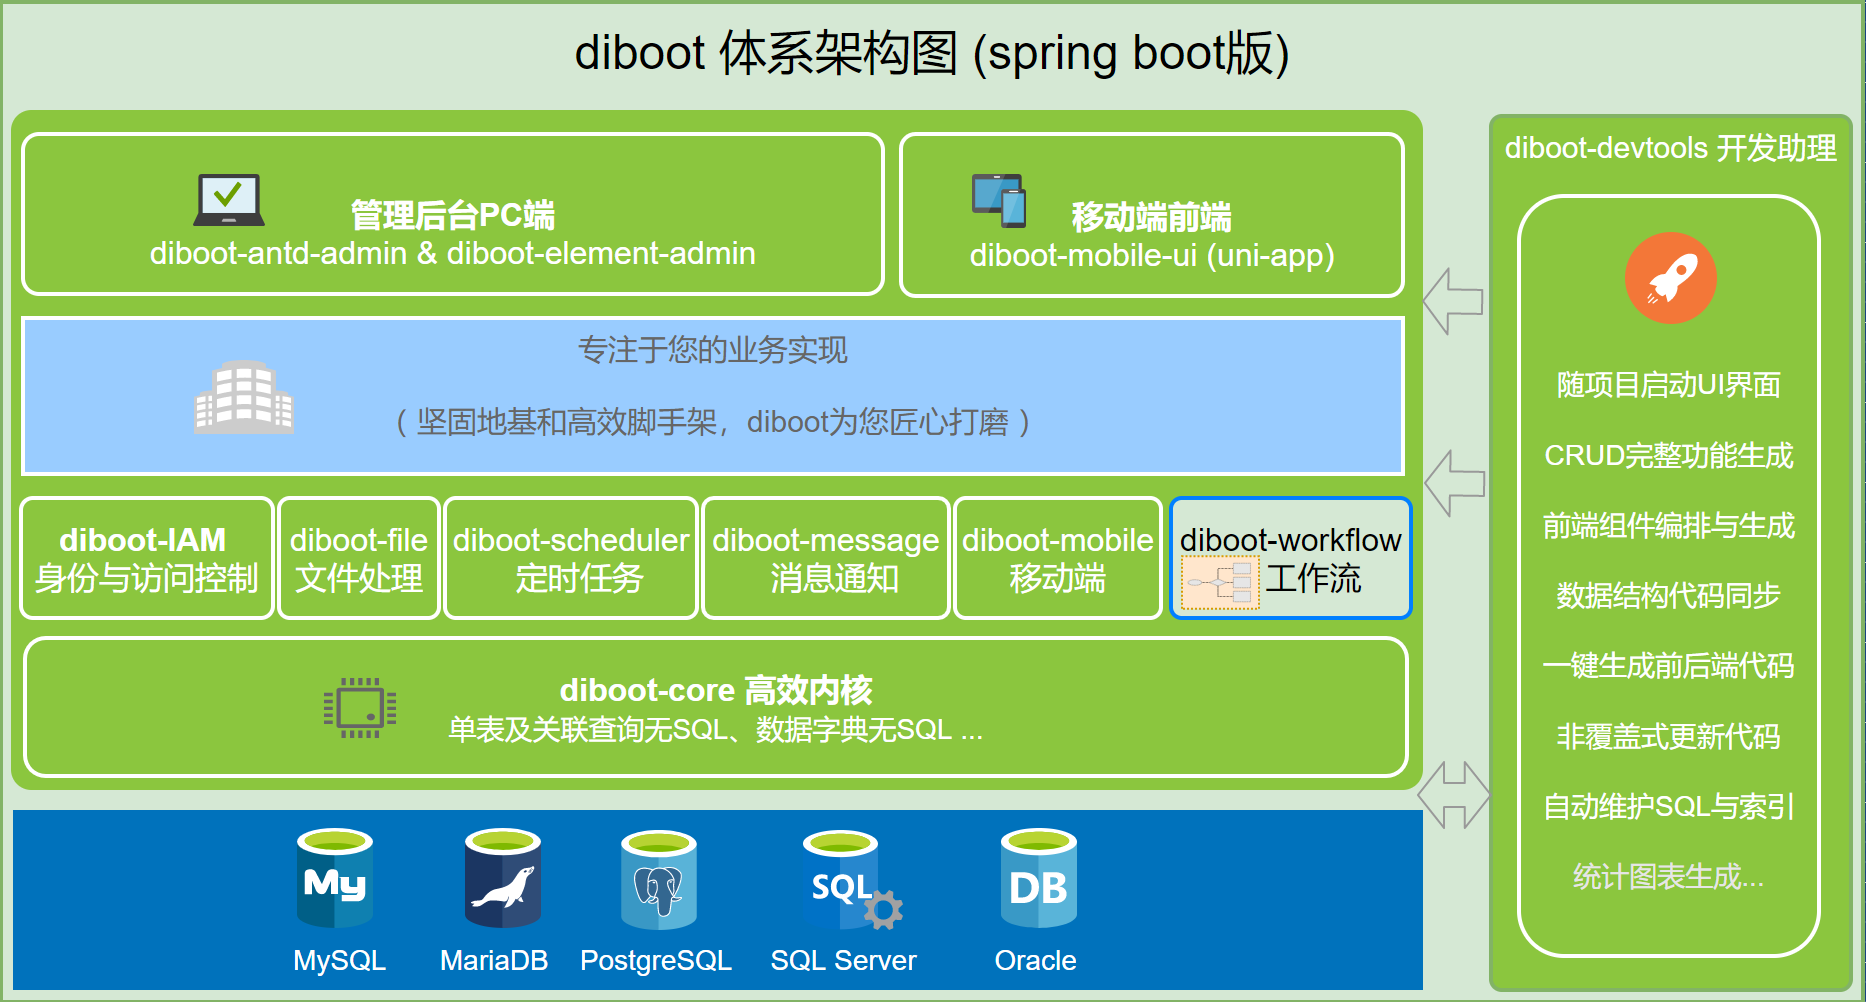
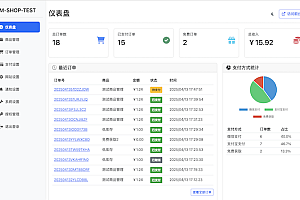
本期推荐的 diboot只为写得更少, 性能更好,是为开发人员打造的低代码开发平台。关联无SQL,性能高10倍,前后端代码可视化生成等全方位赋能!
diboot 的设计理念
- Web开发需要一个普适的基础框架,把复杂的问题简单化,最好还能做到更佳性能,规避常见的坑
- 程序员很难被替代,但程序员应该聚焦于数据结构设计、业务实现、难点解决,重复CRUD没啥长进
- 低代码是未来的趋势,CRUD类重复有规律的工作是可以被自动化甚至被省掉的
diboot 主要技术栈
- 后端Java + 关系数据库,跟紧Spring体系 (Spring Boot、Spring Cloud)
- ORM站队Mybatis,通用Mapper框架选用Mybatis-plus
- 权限: spring boot版本使用Shiro+JWT;spring cloud版本使用spring security + oauth2。
- 前后分离,前端选型Vue,支持ElementUI和Antd vue pro
diboot基础组件
- diboot-core: 精简优化内核:写得更少,性能更好
- IAM 身份认证基础组件 及 配套VUE前端框架(diboot-antd-admin、diboot-element-admin)
- diboot-file 文件相关处理组件
- diboot-scheduler 定时任务组件
- diboot-message 消息通知组件
- diboot-mobile 移动端组件
diboot-core (diboot-core-starter) 使用步骤
引入依赖
<dependency>
<groupId>com.diboot</groupId>
<artifactId>diboot-core-spring-boot-starter</artifactId>
<version>{latestVersion}</version>
</dependency>
或Gradle:
compile(“com.diboot:diboot-core-spring-boot-starter:{latestVersion}”)
2. 配置参数(数据源)
#datasource config
spring.datasource.url=jdbc:mysql://localhost:3306/diboot_example?characterEncoding=utf8&serverTimezone=GMT%2B8
spring.datasource.username=diboot
spring.datasource.password=123456
spring.datasource.hikari.maximum-pool-size=5
spring.datasource.hikari.driver-class-name=com.mysql.cj.jdbc.Driver
-------------------------------------------------------------------------
#diboot-core-spring-boot-starter的可选参数配置:
# 是否初始化sql,默认true,初始化之后(或非开发环境)可以改为false关闭检测
diboot.core.init-sql=false
配置config类
diboot-core-starter默认预置了mybatis-plus的分页配置(使用mybatis-plus 3.4.x的MybatisPlusInterceptor最新配置方式)。 如果您依赖的是core-starter,则无需再次配置mybatis-plus的分页。 如果需要添加其他Interceptor,则需要重新定义MybatisPlusInterceptor。 示例如下:
@Bean
public MybatisPlusInterceptor mybatisPlusInterceptor() {
    MybatisPlusInterceptor interceptor = new MybatisPlusInterceptor();
    interceptor.addInnerInterceptor(new PaginationInnerInterceptor());
    return interceptor;
}
#同时core-starter中也默认配置了HttpMessageConverters,如果需要更改默认配置, 则需要在配置类中重新定义HttpMessageConverters。
@Bean
public HttpMessageConverters jacksonHttpMessageConverters() {
    ...
}
注意:diboot-core-starter预置了默认的配置以及字典表相关的接口实现,如果是老项目中仅依赖diboot-core(非diboot-core-starter),则还需要将diboot的包路径加入ComponentScan中
diboot 新手体验
1. 在IDE中克隆playground项目
“File -> New -> Project from version control…”菜单打开克隆项目对话框:
URL中输入如下playground项目路径,指定项目本地路径(避免中文路径),点击 Clone 按钮
:https://gitee.com/dibo_software/playground.git
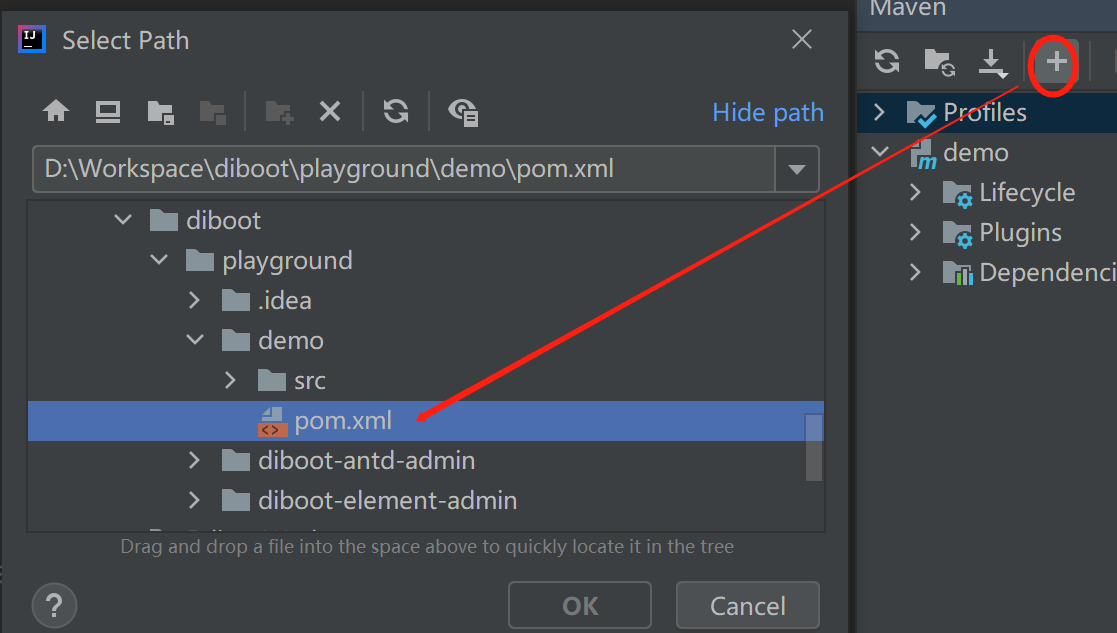
待克隆完成后,在右侧Maven视图中,添加demo项目下的pom.xml
准备数据库后使用devtools初始化代码
- 点击控制台中打印出的URL,进入devtools操作页面。(个人用户初次使用需要扫码)
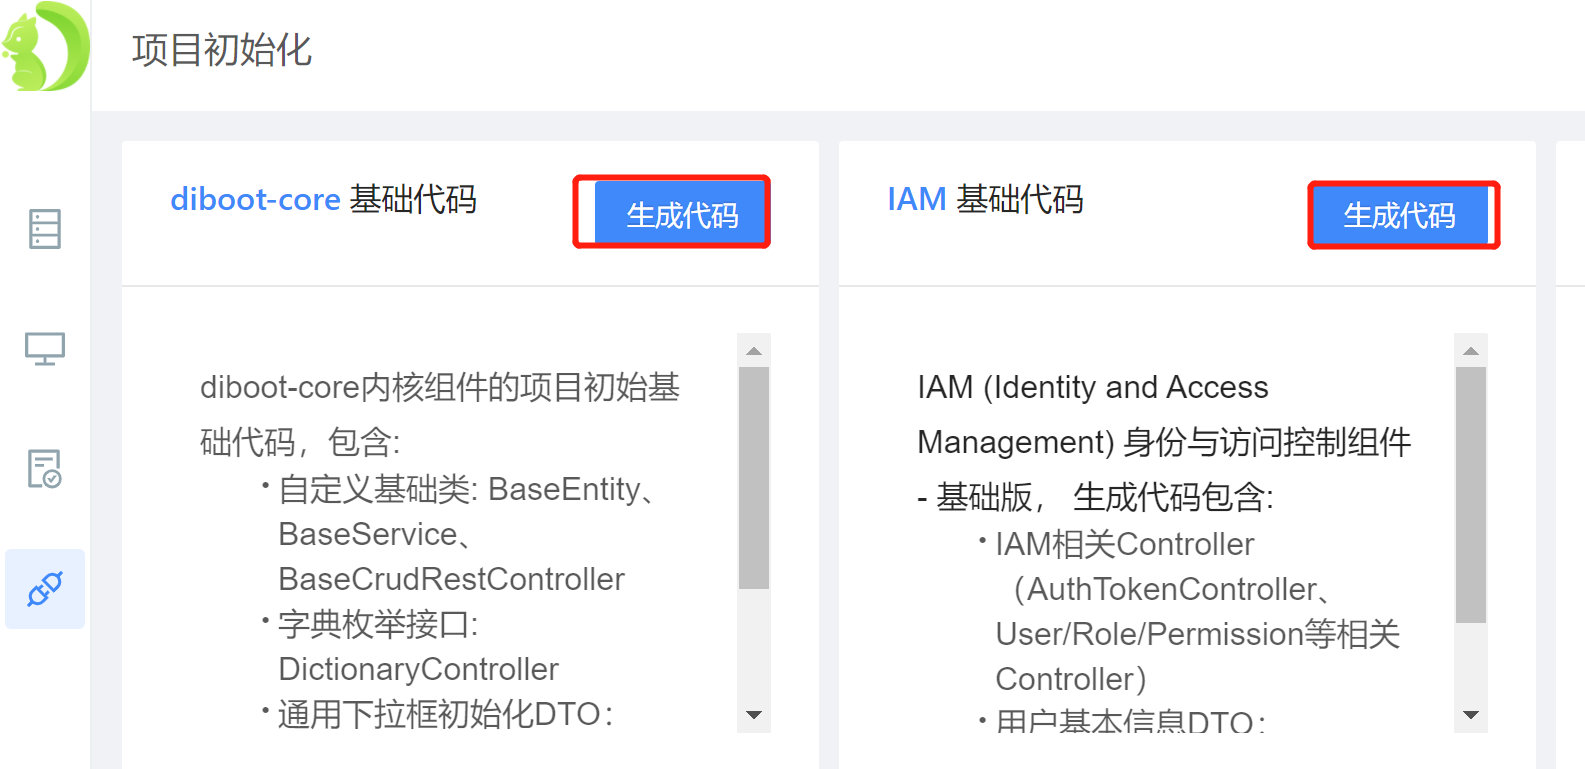
- 初次启动devtools会提示初始化组件的基础代码(为了方便自定义修改,devtools将controller等代码生成到本地项目中)。 依次点击各组件的”生成代码”按钮。
- 打开demo目录下的java目录,将会看到相关组件的初始化代码已生成。
注意:如果启动前端发现验证码无法显示,则需要检查是否执行了这个步骤并重启了项目。登录验证相关的controller需要此步骤中生成


